

How To Repair Hole In Wood Floor
Every type of floor takes a chirapsia from shoes, kids, pets, and moving piece of furniture. At some point, even hardwood floors bear witness signs of wear and tear. Scratches and minor holes in hardwood floors draw in the eye and might be causing you lot stress too. It's spendy to bring in a professional for pocket-sized repairs, though, so consider doing the work yourself to prepare those scratches.
It doesn't matter whether your hardwood floor is maple, walnut, mahogany, bamboo, or oak. The procedure for patching is the same, and typically includes using a filler of some sort.
Step 1 - Investigate the Scratch
First, take a closer expect and and make sure the imperfection is really a scratch. Sometimes a mark can look worse than it really is. If you can, figure out whether the scratch is merely on the cease or goes into the forest itself.
Stride 2 - Fix Scratches
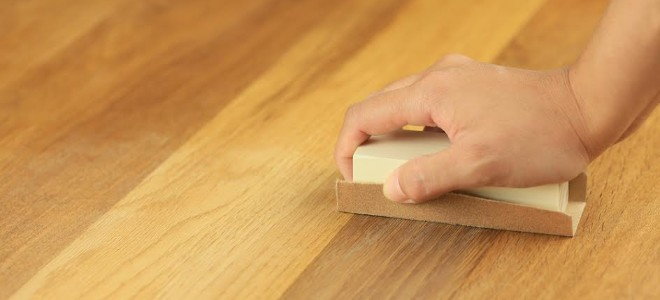
Superficial scratches can typically be buffed out. Effort some furniture cleaner or wood restore oil.
To ready deeper scratches, you'll demand to fill up them in post-obit the directions for fixing holes below. The easiest offset line of defense is a wax repair stick made specifically for this chore. Look for a color that matches your woods. If the paste wax won't stick to your finish, you'll take to move on to another tactic.
When fillers are required, make certain you locate the right one for the job. Latex fillers are common, simply they don't hold stains, then they're primarily for deep merely very narrow holes such as small gaps or smash holes.
Epoxy filler is some other selection that'south a picayune more work, every bit it requires mixing together 2 ingredients to create the compound. It's compress and scissure resistant, then it makes a practiced option for filling cracks. Like latex, epoxy fillers don't piece of work well with stain, so brand certain yous choose a colour that matches your floor. For the best match, utilize sawdust from your flooring and mix it with gum to make your own filler.
For areas with large scratches, utilize a sander to bring the surface down to the existing flooring. Start with 100-dust and finish with 150-grit or 200-grit. Always sand in the management of the wood grain and feather out the edges slightly to blend in with the surrounding flooring.
Alarm: For safety, always wear a dust mask, gloves, and a pair of goggles when sanding.
When yous're done, you'll need to refinish that department of floor, which is perhaps the most difficult part of hardwood floor repair. If your repair spot is large, you may want to wait until yous're refinishing the unabridged floor to brand your repairs, or call in a professional that tin can match both your stain color and finish way. To do it yourself, yous'll want to know whether your end is urethane or wax so you lot can match information technology with your repair.
Step iii - Sand the Holes
Hardwood flooring can start wearing away as time passes, and you may start to notice pocket-size holes in the forest. Clean these indents with a folded slice of sandpaper. Fold the sandpaper and then it has a pointed edge.
Information technology's important to smooth the edges and then the repair materials stick to raw wood rather than a terminate on the floor. Utilize a hair dryer or outburst of air from a compressor to blow dust out of the pigsty or task a store vac with the job.
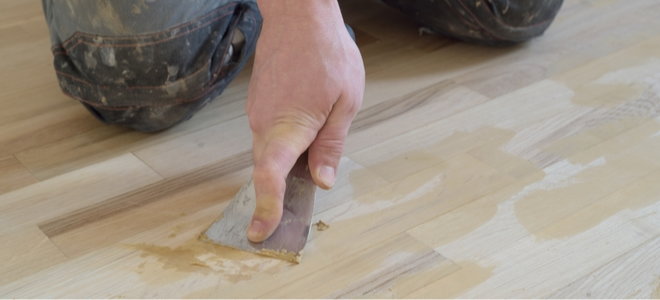
Pace 4 - Apply Forest Putty
Cull a wood filler that matches the color of your hardwood flooring. Use a putty knife to put the putty into the holes in minor quantities, and press it downwards so it fills the holes completely. Apply a scrap of extra putty over the pigsty and so yous have a pocket-sized mound.
Check and read the manufacturer's instructions to see how long you lot should wait for the putty to dry thoroughly. It usually takes almost 24 hours. Use sandpaper to polish the bump downward until it's level with the surrounding floor.
Footstep five - Stain the Floor
For those fillers that accept stain, use a sponge brush to employ it to the area where y'all filled the pigsty. Let the stain dry thoroughly for a day, then use 2 coats of polyurethane gloss.
Use the sponge brush again and allow the gloss to dry overnight. Sand the surface area lightly later the first coat dries, creating a shine on the restored hardwood floor. Keep the spot blocked off for two days so the floor cures thoroughly before you use it over again.
Step 6 - If the Damage Is As well Bad, Supervene upon the Lath
When the damage is too extensive for an easy repair, it'south meliorate to remove and replace the damaged forest. To do this, use a hammer and chisel to create a straight line cut across the board. Using a circular or other saw, cut a few relief lines along the length of the board so y'all can remove the pieces of board.
Clean out the empty section and ensure your cease cuts are straight and so the new piece sits flush on both ends. Remove the lower edge of the groove portion on the new board so it tin lower into identify. Make certain you cut your new board so the tongue fits into the groove of the installed floor. And then install your new board and cease it with stain and sealer to match your existing floor.
Source: https://www.doityourself.com/stry/how-to-patch-scratches-and-small-holes-in-hardwood-floors
0 Response to "How To Repair Hole In Wood Floor"
Post a Comment